|
Preparing
your linework for colouring:
|
||
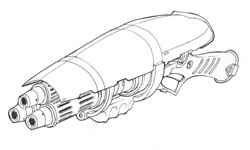 |
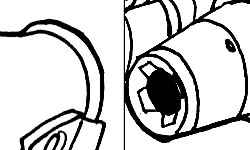
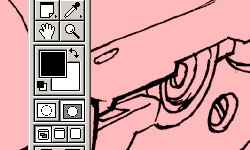
So you've just finished a sketch and it's in Photoshop ready to colour. Now it's time to ask how you're going to turn that opaque black and white sketch into an transparent overlay to use either as a guide for your painting or as the linework for your cell-shading. This tutorial will show you what I do to prepare linework for painting. I'm using this sketch of a high-tech Halo-style plasma gun as an example. |
|
 |
1. After scanning your linework in at the twice the resolution you want the painting to be (300dpi is the standard print res, so going for 600dpi is ideal), you'll probably discover a few eraser smudge marks still in your sketch (My pencil-work is never clean, so I find more than enough!). These should be cleaned out and thankfully, it's not a labourious eraser-tool job.
|
|
 |
2. Choose "Image"
-> "Adjust" -> "Levels..." from the top menu
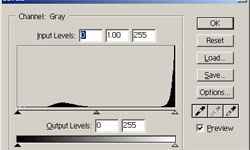
bar in Photoshop. Now you should see a black graph with three triangles
spaced below it. This is the levels graph for your sketch, and it indicates
how much shadow, midtones and hilite is present in your image. The left
triangle represents total black, the middle 50% gray and the right is
for complete white. |
|
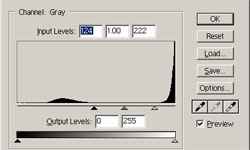 |
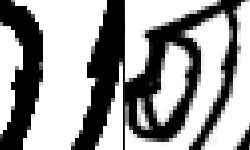
3. The Levels adjustment tool is very useful for adjusting the balance of values in your image. Have a go at sliding the three triangles to different positions and watching the result. In the end, I prefer having the values set as shown on the left. | |
 |
4. That small amount of dark grey is now left of the absolute black mark, so all the linework is now 100% black. Also the 100% white marker now includes all the light grey values. This makes all the eraser marks just as white as the page now. | |
 |
5. Use "Image" -> "Image Size..." to drop the resolution of your image down to 300dpi, ready for painting. This brings a little anti-aliasing to sketchwork by averaging some of the edge pixels to grey again. Just like the "2x" and "4x" settings on a Geforce Card, the higher the resolution you reduce the image from, the smoothing the anti-alasing effect will be. | |
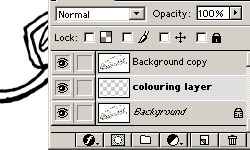 |
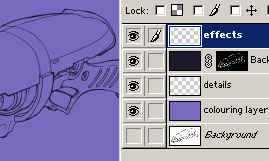
6. Convert your image to RGB using "Image" -> "Mode" -> "RGB Color". Duplicate your background layer by dragging it over the "Create New Layer" icon. Then create a new layer to fill between the two others and call it "colouring layer". | |
 |
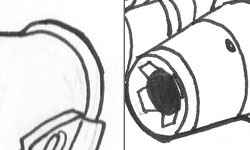
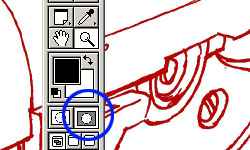
7. Make sure your background duplicute layer is selected. Click on the Channels Tab,click on the "RGB" tab to select all four channel tabs and then click the "Load Channel as Selection" button as indicated in the left example. Selection marquees should appear around all your linework. | |
 |
8. Hit "Q" to turn Quick Mask on or click on the button itself, shown circled. This overlays all UNSELECTED areas on your image with red. Don't panic, the red hasn't be painted onto your work, it's just an indication of what area's have been "masked out". | |
 |
8. Turn Quick Mask off again, choose "Select" -> "Inverse" and then turn Quick Mask back on again. Now you'll see all your linework has become selected. | |
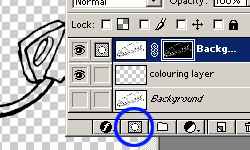 |
9. Turn Quick Mask off again to return the selection marquees (last time you'll need to do this, I promise!). Now here's the cool part: With your background duplicate layer selected, click the "Add a mask" icon as indicated. A new thumbnail will appear next to your layer's thumbnail. This is the layer mask, which is basically a layer upon a layer which uses black as completely transparent, white as opaque and grey as semi-transparent. Turn off the background layer and see the result. | |
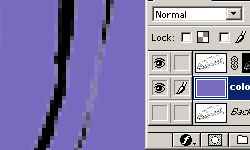 |
10. Fill your "colouring layer" with any colour at all, like you're starting to paint. See the grey areas around your lines? These can be fixed by clicking on the left thumbnail of your background duplicate layer, choosing a dark colour from the colour-picker like a dark grey-blue, selecting the entire layer with "Select" -> "All" from the top menu and then filling the layer with "Edit" -> "Fill..." | |
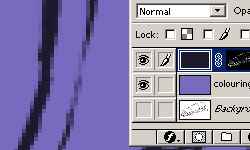 |
11. The gray edges of your lines are gone and instead of straight black, you've got a tint of colour in your sketchwork. | |
 |
12. Now you're ready to colour, either on the "colouring layer" or on layers added above or below the masked layer. You can also paint colours into the linework while the layer mask is still active. | |
| Rendering a Plastic Surface | ||